Saturday, November 12, 2011

Lewis Center Wildlands Rehab Study Setup: Day 1


Day 1: Monday 11/7/2011

Weather was perfect; no wind, enough clouds so the sun was not to hot, a high of about 60 F, following a light weekend rain.

Dr. Ken Lair, Jackie Lindgren, Matt Huffine, David Pike, about 20+/- JROTC students from the senior flight, along with a handful other students that joined periodically throughout the day worked together to:
  • Auger about 1000+ holes to install 125 one gallon plants for each of 12 different species.
  • Dig out each hole by hand.
  • Water each hole with a 3 second burst of water from a hose (equipped with a standard garden multiple orifice attachment) attached to a portable, trailer mounted "yellow" water tank using the Quad batteries to pressurize the tank.
  • Measure out a tablespoon of mycorrhizal inoculant for each hole or place a "tea bag" with mycorrhizal inoculant and plant friendly water absorbing polymer in each hole.
  • Haul in on a trailer pulled by a quad 1 gallon plants that were planted in double rows of 10 each at about a two on center spacing from each other (within and between the rows). The plants were grown especially for this project by Mountain States Wholesale Nurseries in Arizona.
  • Water each plant after planting with a 3 second burst of water.
  • Weave a 3+ foot bamboo stick down through the rabbit/rodent guards to anchor them into the ground.

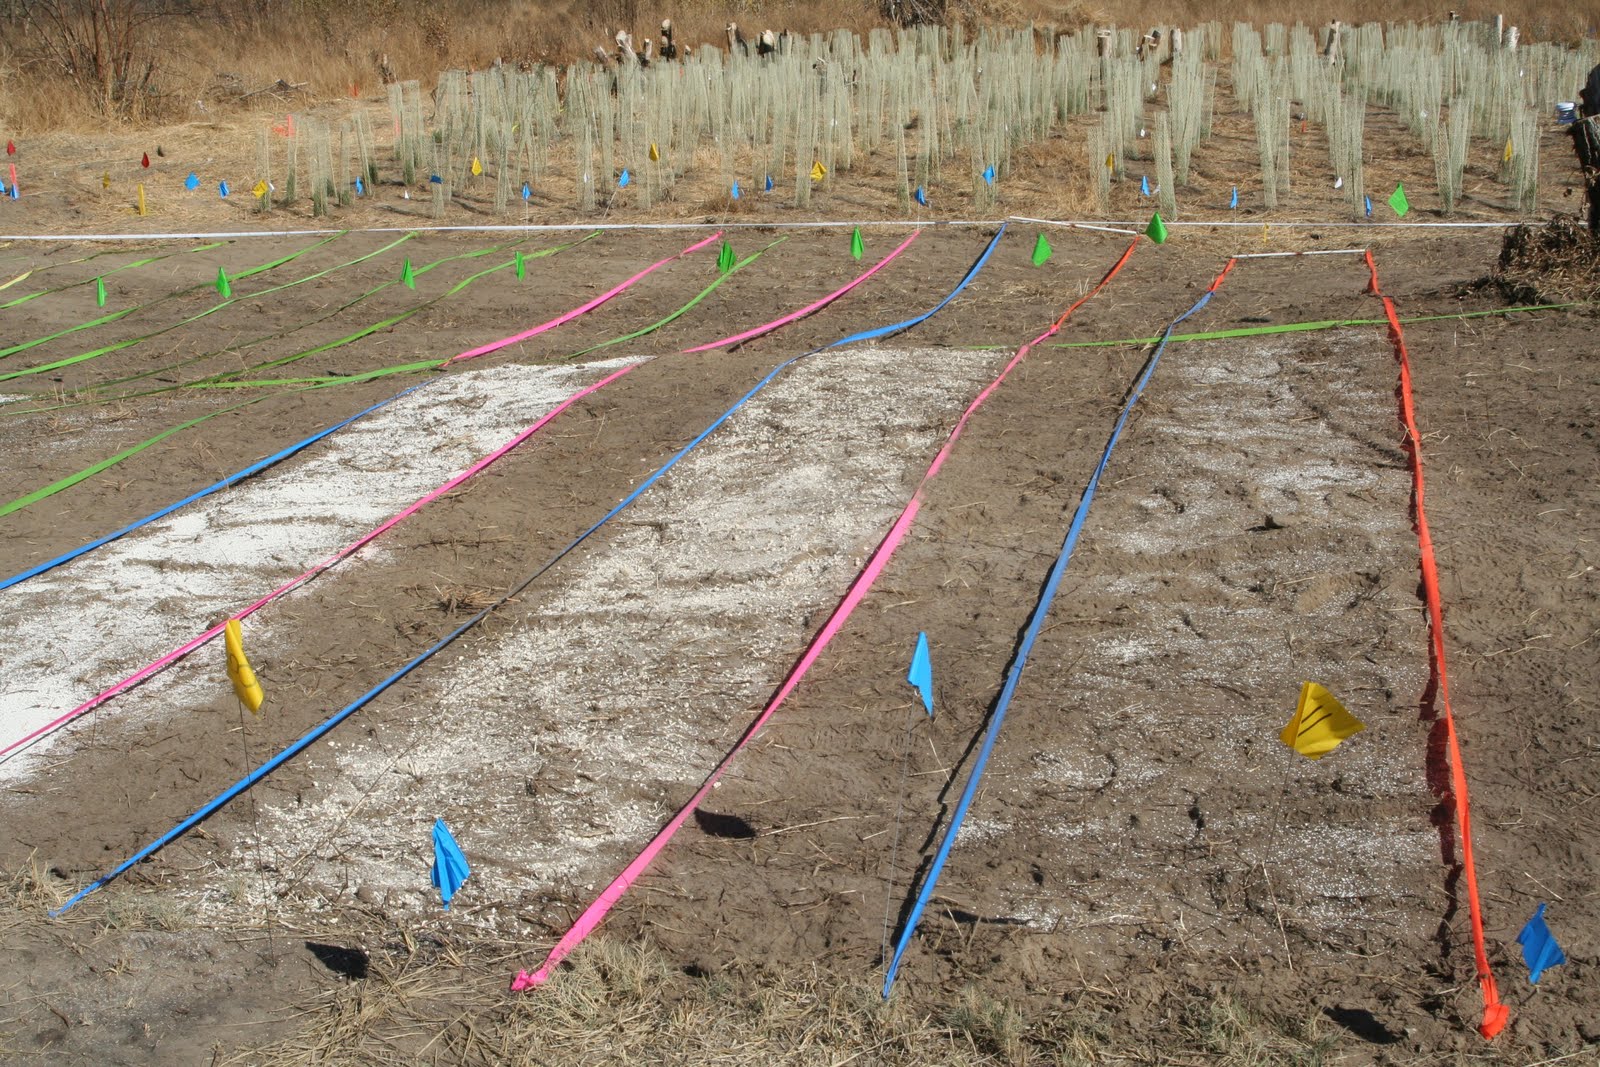
What the study plot looked like at the start of the day 1:


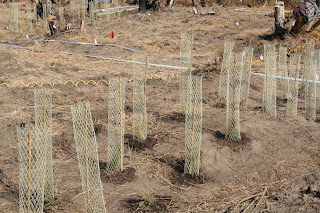
And at the end of day 1:


Lewis Center Wildlands Rehab Study Setup: Day 2


Day 2: Tuesday 11/8/2011

Weather was perfect again; no wind, enough clouds so the sun was not to hot, a high of about 60 F.

Dr. Ken Lair, Jackie Lindgren, Matt Huffine, David Pike, about 20+/- JROTC students from a flight composed of juniors and sophomores, along with a handful other students that joined periodically throughout the day worked together to complete all the tasks started during Day 1 on Monday 11/7/2011 which included
  • Hauling down and distributing most of the remaining plants, finishing auguring out and cleaning out the remaining holes.
  • Providing each plant with its prescribed treatment by plot location (innoculum, teabag and/or zeolite column).
  • Watering each planting location before and after planting.
  • Affixing a rabbit guard and bamboo pole above each planting.
Besides completing the steps outlined above, ones required for setting up the test plots that required 1 gallon plants, this group finished the day doing quality control for the work that was completed during the first 2 days of work.


What the study plot looked like at the start of the day 2:


What the study plot looked like at the end of day 2:

Lewis Center Wildlands Rehab Study Setup: Day 3

Day 3: Tuesday 11/9/2011

As with the first two days, the weather was perfect again; a slight wind kicked up about midday. We had more cloud cover then we had for the first two days and a high temp. of about 55 F. The soil was dryer than it was during the first two days. Dr. Ken Lair, Jackie Lindgren, Matt Huffine, David Pike, about 20+/- JROTC students from a flight composed of sophomores and freshman, along with a handful other students that joined periodically throughout the day worked together to complete all the tasks started on Day 1 on Monday 11/7/2011 and continued on Day 2 on Tuesday 11/8/2011 which included:
  • Hauling down and distributing the remaining plants, finishing auguring out and cleaning out the remaining holes.
  • Providing each plant with its prescribed treatment by plot location (innoculum, teabag and/or zeolite column).
  • Watering each planting location before and after planting.
  • Affixing a rabbit guard and bamboo pole above each planting.
  • Besides completing the steps outlined above, ones required for setting up the test plots that required 1 gallon plants, this group also spent time doing quality control for the work that was completed during the first 3 days of work.

Seed Bed Prep, Planting and Covering

  • Tilling seed plot 1 and part of 2.
  • Racking and leveling/smoothing out the freshly tilled seed plots.
  • Rolling the leveled/smoothed freshly tilled seed plots with a yellow water filled 250+ lbs metal roller.
  • Segmenting the rolled seed plots into 3' by 40 foot seed beds bordered by 2' by 40 foot walkways using flagging and colored tape.
  • Seed was carefully weighed out and put into paper bags.
  • Placing a bag of seed in front of each 3 by 20 foot rolled seed bed.
  • Seeding 20 feet of each 40 foot bed with a single species of plant (20 feet received a bare, untreated seed, the other 20 feet a seed coated with clay and microrizal innoculum and a polymer that attracts and holds on to water)
  • Microrizal innoculum was spread out over the seed beds that received bare seed.
  • Rolling seed beds after receiving seed and innoculum.
  • Cutting 4 foot rolls of jute netting into 40 foot long pieces.

  • Removing plastic guide tapes and flagging after seeding and rolling.
  • Laying jute cloth onto each seeded and roll seed bed.
  • Staking down each 4 x 40 foot piece of jute cloth using clear plastic biodegradable spikes.
  • Repeating this seed bed preparation for the next 2 additional seed bed plots.
What the study plot looked like at the start of day 3:

What the study plot looked like at the end of day 3:


Mojave River Wildlands Rehab Study Setup: Day 4

Day 4: Thursday 11/10/2011

As with the prior three days, the weather was perfect again; the cloud cover pretty much set a gray cast of the day however. The high temp. was about 53 F. The soil was dryer than it was during the first three days. Dr. Ken Lair, Jackie Lindgren, Matt Huffine, about 20+/- JROTC students from a flight composed of mainly freshman, along with a handful other students that joined periodically throughout the day worked together to complete all the tasks started on Day 3, Wednesday 11/9/2011 :

Seed Bed Prep, Planting and Covering

  • Tilling seed plot 3.
  • Racking and leveling/smoothing out the freshly tilled seed plot.
  • Rolling the leveled/smoothed freshly tilled seed plots with a yellow water filled 250+ lbs metal roller.
  • Segmenting the rolled seed plots into 3' by 40 foot seed beds bordered by 2' by 40 foot walkways using flagging and colored tape.
  • Seed was carefully weighed out and put into paper bags.
  • Placing a bag of seed in front of each 3 by 20 foot rolled seed bed.
  • Seeding 20 feet of each 40 foot bed with a single species of plant (20 feet received a bare, untreated seed, the other 20 feet a seed coated with clay and microrizal innoculum and a polymer that attracts and holds on to water)
  • Microrizal innoculum was spread out over the seed beds that received bare seed.
  • Rolling seed beds after receiving seed and innoculum.
  • Cutting 4 foot rolls of jute netting into 40 foot long pieces.

  • Removing plastic guide tapes and flagging after seeding and rolling.
  • Laying jute cloth onto each seeded and roll seed bed.
  • Staking down each 4 x 40 foot piece of jute cloth using clear plastic biodegradable spikes.
  • Repeating this seed bed preparation for the next 2 additional seed bed plots.
  • Broadcasting across the entire site an organic rodent repellent made of pig and beef blood.

What the study plot looked like at the start of day 4:


What the study plot looked like at the end of day 4, the final workday (a panorama from the southwest corner looking back at the school behind the northeast corner of the study site)


Jacob Winsor surveying the finished project.


Jackie Lindgren (MDRCD) and Dr. Ken Lair (NRCS retired) surveying the finished study site.


Jackie and Dr. Lair leaving the location with the tools that were used to set up the study site.

What is Environmental Mitigation?

Consider a private land developer that comes to the High Desert to make some money. A parcel of land suitable for the developers plan is found. Zoning maps are checked down at the city planners office, and the parcel under consideration is zoned for the developers intend use. The land is purchased and development plans are submitted to the city planner.

It just so happens, the land that was purchased has been receiving a continuous flow of urban runoff from a nearby housing subdivision for over 20 years. The excess water created small 5 acre stream fed oasis for local flora and fauna. The planned development of the property would require the drying and covering of the oasis.

When an environmental assessment of the property was conducted, it was determined that the developer would have to either build around the oasis, effectively including it in the development, or make up for the impacts of its destruction. Put another way, the developer would have to mitigate or offset the impact of the planned development by participating in a project that would enhance the value of 5 acres of an existing and nearby wetland to support indigenous species or add 5 acres to an existing and fully functional wetlands conservation area. By participating in one of the preceding to options, the developer effectively has mitigated the negative impact of the development on the artificial oasis. The conservation area that was enhanced and or acreage was added to is in effect a mitigation bank.

The Brief History of a Mojave River

First some basics. Take a 5-gallon bucket of water, pick a fairly flat surface anywhere in a desert landscape and gently pour it out. You will observe that your water, if given a chance, will always flow downhill (as if it were playing a game of how low can I go) until it can no longer do so, forming a puddle; unless, of course it has either evaporated or soaked into the soil first.

The same basic scenario plays out whenever precipitation falls on ground that is not sloped and usually results in a puddle, a pond, a lake etc. before it either evaporates or soaks into the substrate (sand, gravel or soil). However, give that standing water body any slight irregularity in its margin and water will physically, chemically and biologically eat away at it until it can flow past the original barrier. Rest assured, the entire process will start anew when the freely flowing water reaches another barrier that forces it to puddle up again. Eventually, in time, if any of the original surface water remains, it will find itself all gathered up at the lowest spot on the terrain it has been traversing. In most cases the path that water takes on our planet can be described as generally equatorial with long westerly or easterly meanders. As for the "low spots", well those are generally the margins of some bigger puddles that are called seas and oceans.

From time to time, forces from beneath (see plate tectonics) can significantly change the elevation and surface terrain of the "playing board" that water has been slowly modifying in its quest for "low spots". The terrain can be lifted to form mountains, stretched to form valleys or titled in any direction. Sometimes, existing mountain ranges can even be moved long distances, like giant land cruising ships, into, through or alongside a previously and relatively level landscape, resulting in havoc on the paths of existing water courses and the stable watersheds that they have meticulously forged over time. To view the theorized sequence of geologic events that has led up to the present geographic configuration of California, view the sequence of animation at this site.

Compared to the landscape features like Rocky Mountains, the Sierra Nevada and even the San Andreas fault and the resulting Transverse Ranges of Southern California (see California's Coastal Mountains), the Mojave Desert and its landscape is relatively young (an effect of faulting and mountain building) and still in a state of flux. To view the theorized sequence of geologic events that has led up to the present geographic configuration of California and the present day landscape of the Mojave desert, view the sequence of animation at this site. A careful study of the Mojave's water courses, watersheds and flora and fauna can also point to a relatively recent and turbulent origin of its present landscape.

Stay tuned... More to follow...